Adapters
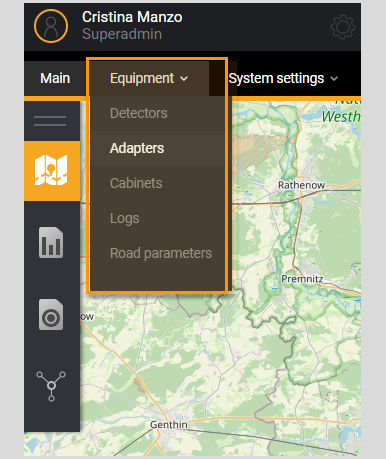
The Adapters section is intended for setting up an adapter in the System, a software module of the SmartRoad software package, which is responsible for transforming the data received from the Detectors (DT).

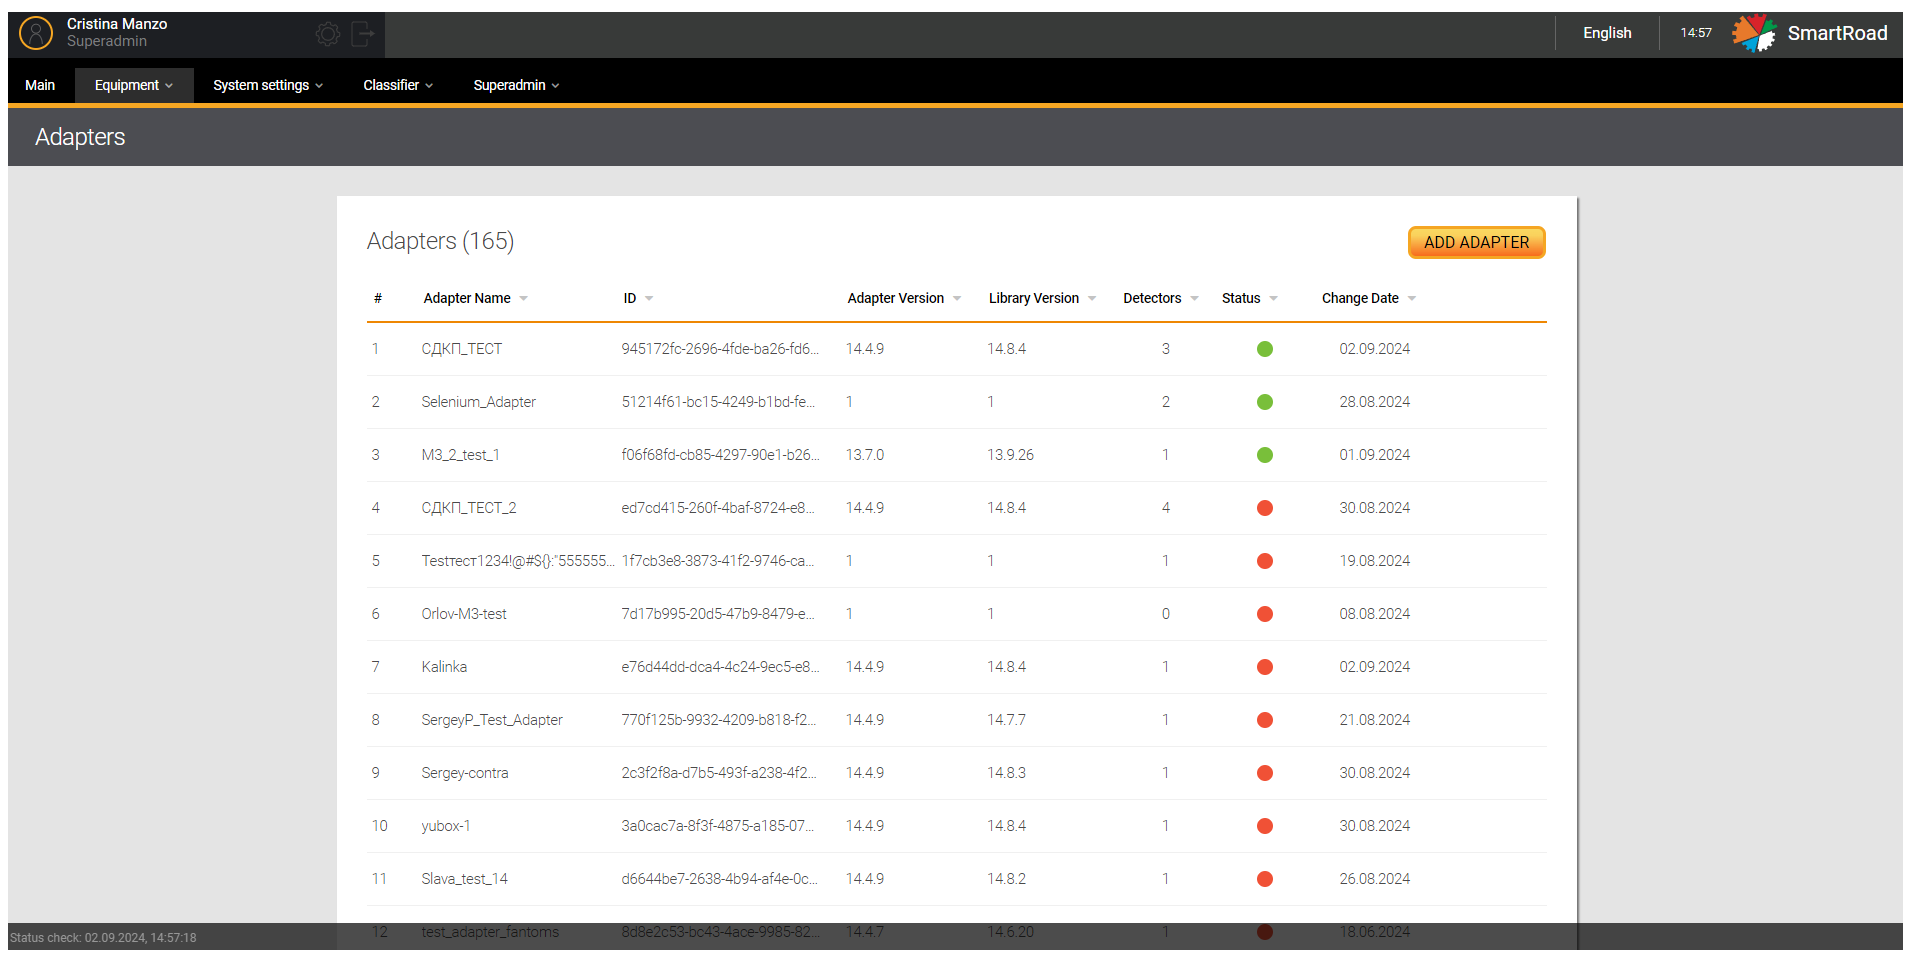
In this section, the user has access to a list of saved adapter settings in the System.

Next you can find the Adapter list parameters
| Parameter | Description |
|---|---|
| # | The serial number of the entry in the list |
| Adapter name | Adapter name specified when added to the System |
| ID | Unique adapter ID |
| Adapter version | Adapter version used |
| Version libraries | Library version used |
| Detectors | Number of detectors interacting with adapter |
| Status | Status indicator for data exchange with the adapter: * Green – data is coming from the adapter * Red – data is NOT coming from the adapter |
| Date changes | Date the adpater information was last edited |
The list allows you to sort by adapter name, ID, adapter version, library version, number of detectors, data exchange status, date of last change of information about the adapter.
Adding an adapter
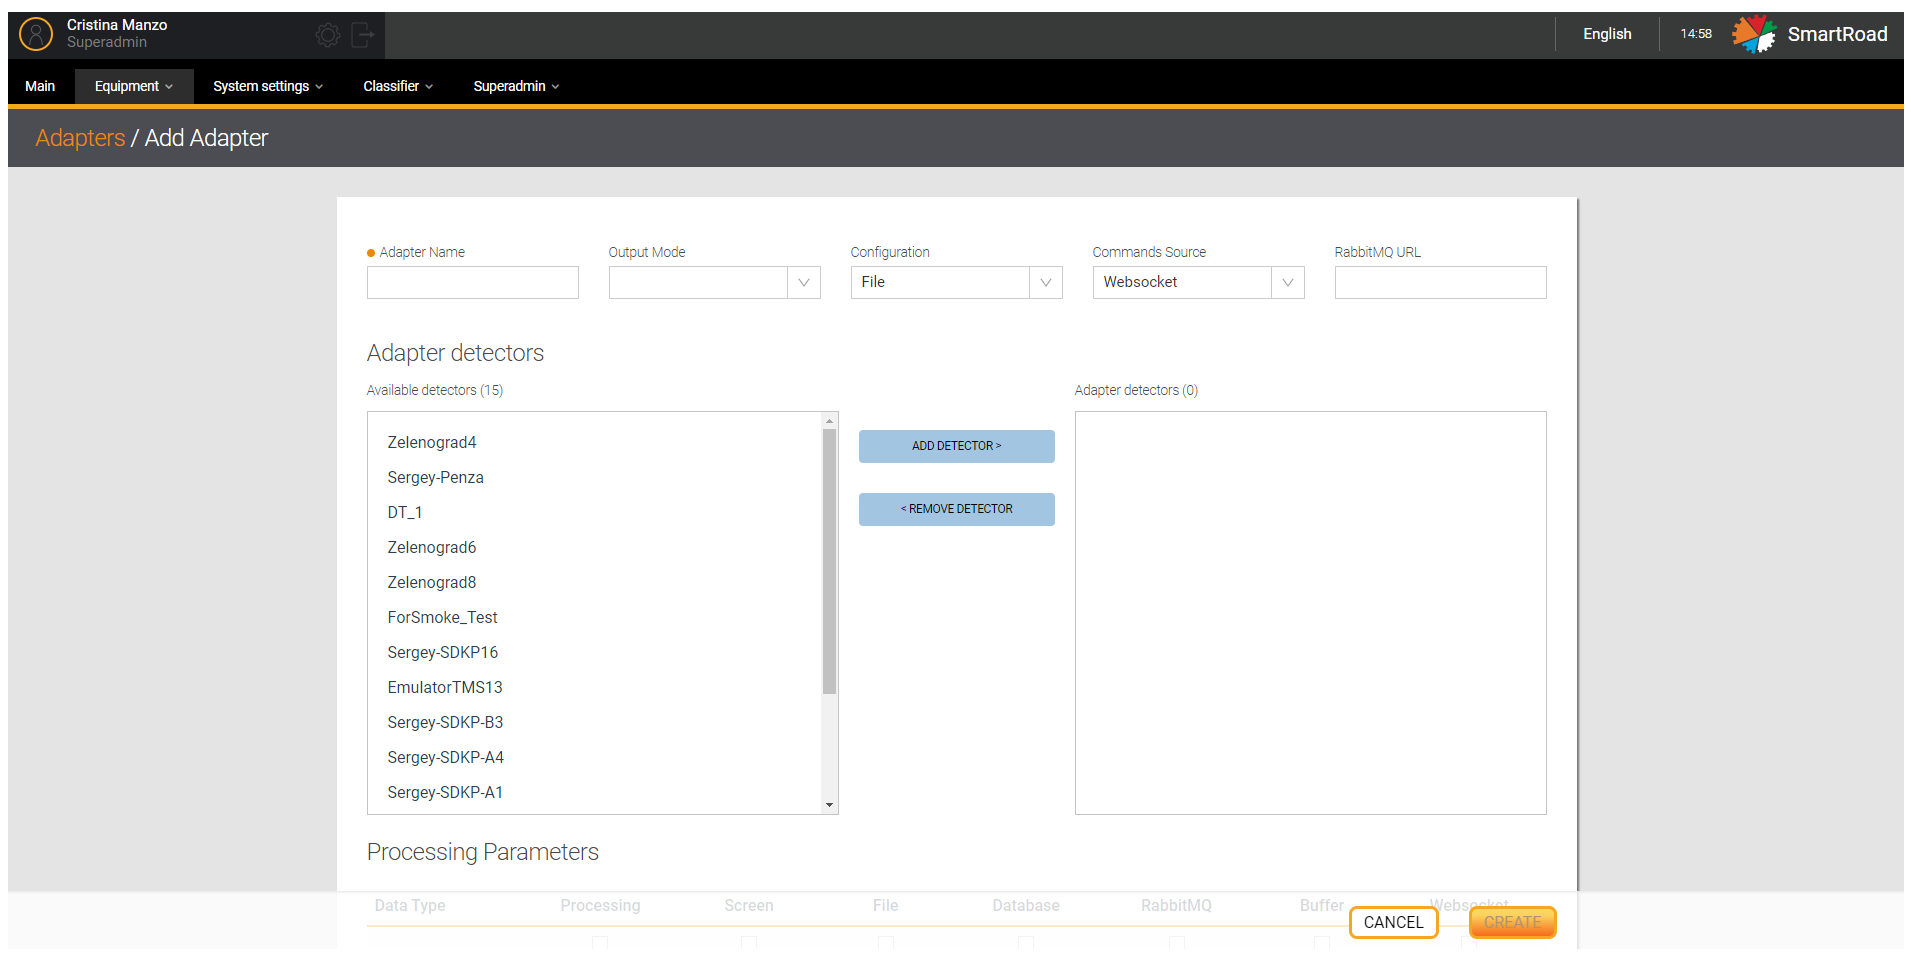
Adding and configuring an adapter is done by clicking on the button Add adapter. When the button is clicked on, the user is shown a page for entering adapter configuration parameters.


Below the Parameters in Add Adapter page are described.
| Parameter | Description |
|---|---|
| Adapter name* | Enter the unique name of the adapter in the field |
| Output mode | The drop-down list displays all available data output modes: selection is made by checking the checkbox |
| Configuration | The drop-down list displays available sources for obtaining configuration for the adapter |
| Command source | The drop-down list displays available sources for receiving commands for the adapter |
| RabbitMQ | The address of the RabbitMQ message broker resource is entered in the field. |
| Project | The project to which the cabinet belongs in the System |
| Detectors | Name of detectors interacting with the cabinet |
| Date changes | Date the information was rack last edited |
Besides, those related to Adapter detectors
| Parameter | Description |
|---|---|
| Available detectors | Detector selection block, which displays detectors available for adding that will interact with the adapter (detectors must be added to the system in advance). You should select and click on Add detector button to add a new detector |
| Adapter detectors | The detector selection block displays the added detectors. Detectors are removed by selecting a detector in the emerged window and clicking on the Remove detector button |
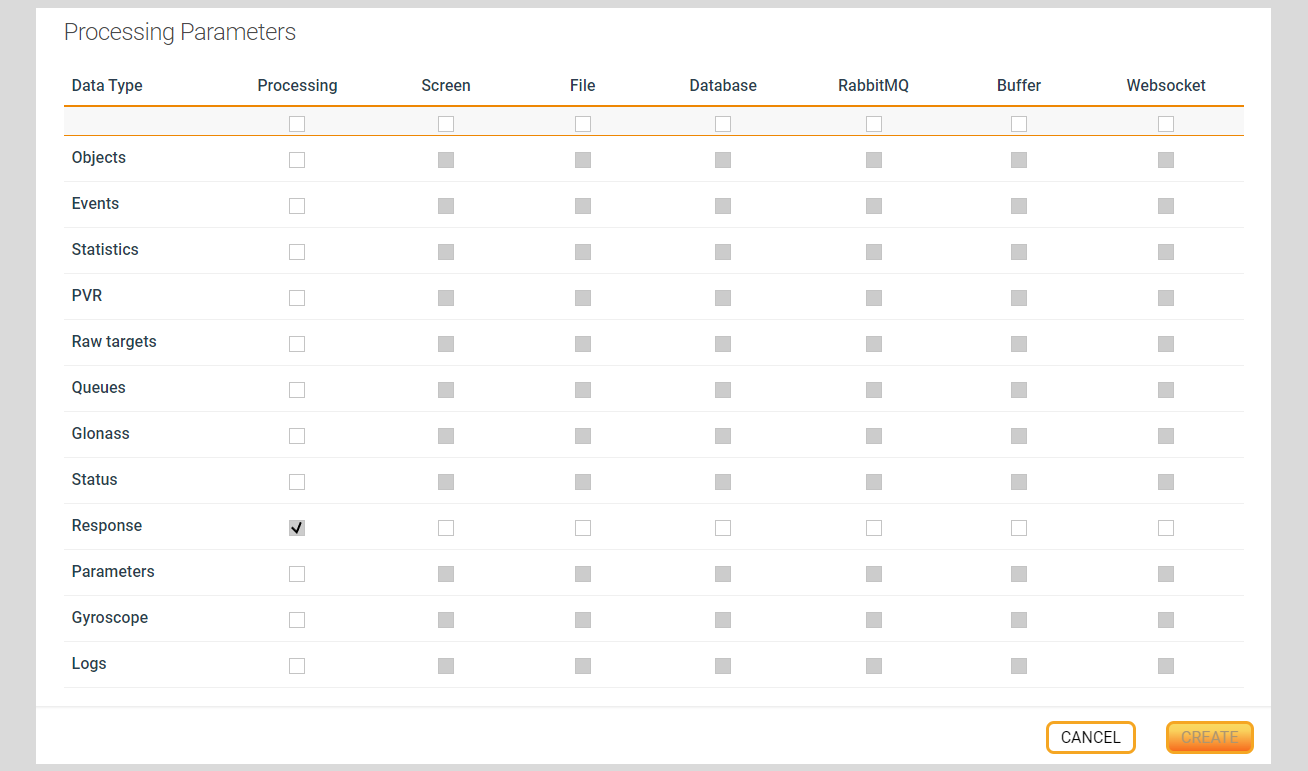
| Output Options data | The field sets data output parameters: Processing – processed in the adapter; On screen – displayed on the screen of a mini-PC or on a server To file – recorded in a log file on a mini-PC or on a server To the database – saved in the database (PostgreSQL); RabbitMQ – to the RabbitMQ queue; To buffer – to SQLite buffer; * To websocket – transfer data to the server via the websocket installed in the adapter Depending on the type of data and the type of data output, the user has the opportunity to set checkboxes. An installed checkbox indicates that a certain type of data will be output. |
| Save | Saving the entered parameters and creating a new adapter in the System |
| Cancel | Undo all previous changes |
(*) - It is mandatory field
Removing and editing an adapter
You have to hover the mouse cursor over the entry in the list and click on the Edit button to change the adapter settings. When you click on the button, an editing page will open (similar to the add adapter window) with previously specified parameters.
Click on the Delete button to remove adapter settings from the system. When you click on the button, you must confirm the deletion in the pop-up window by clicking the Delete button or cancel the deletion by clicking on the Cancel button.