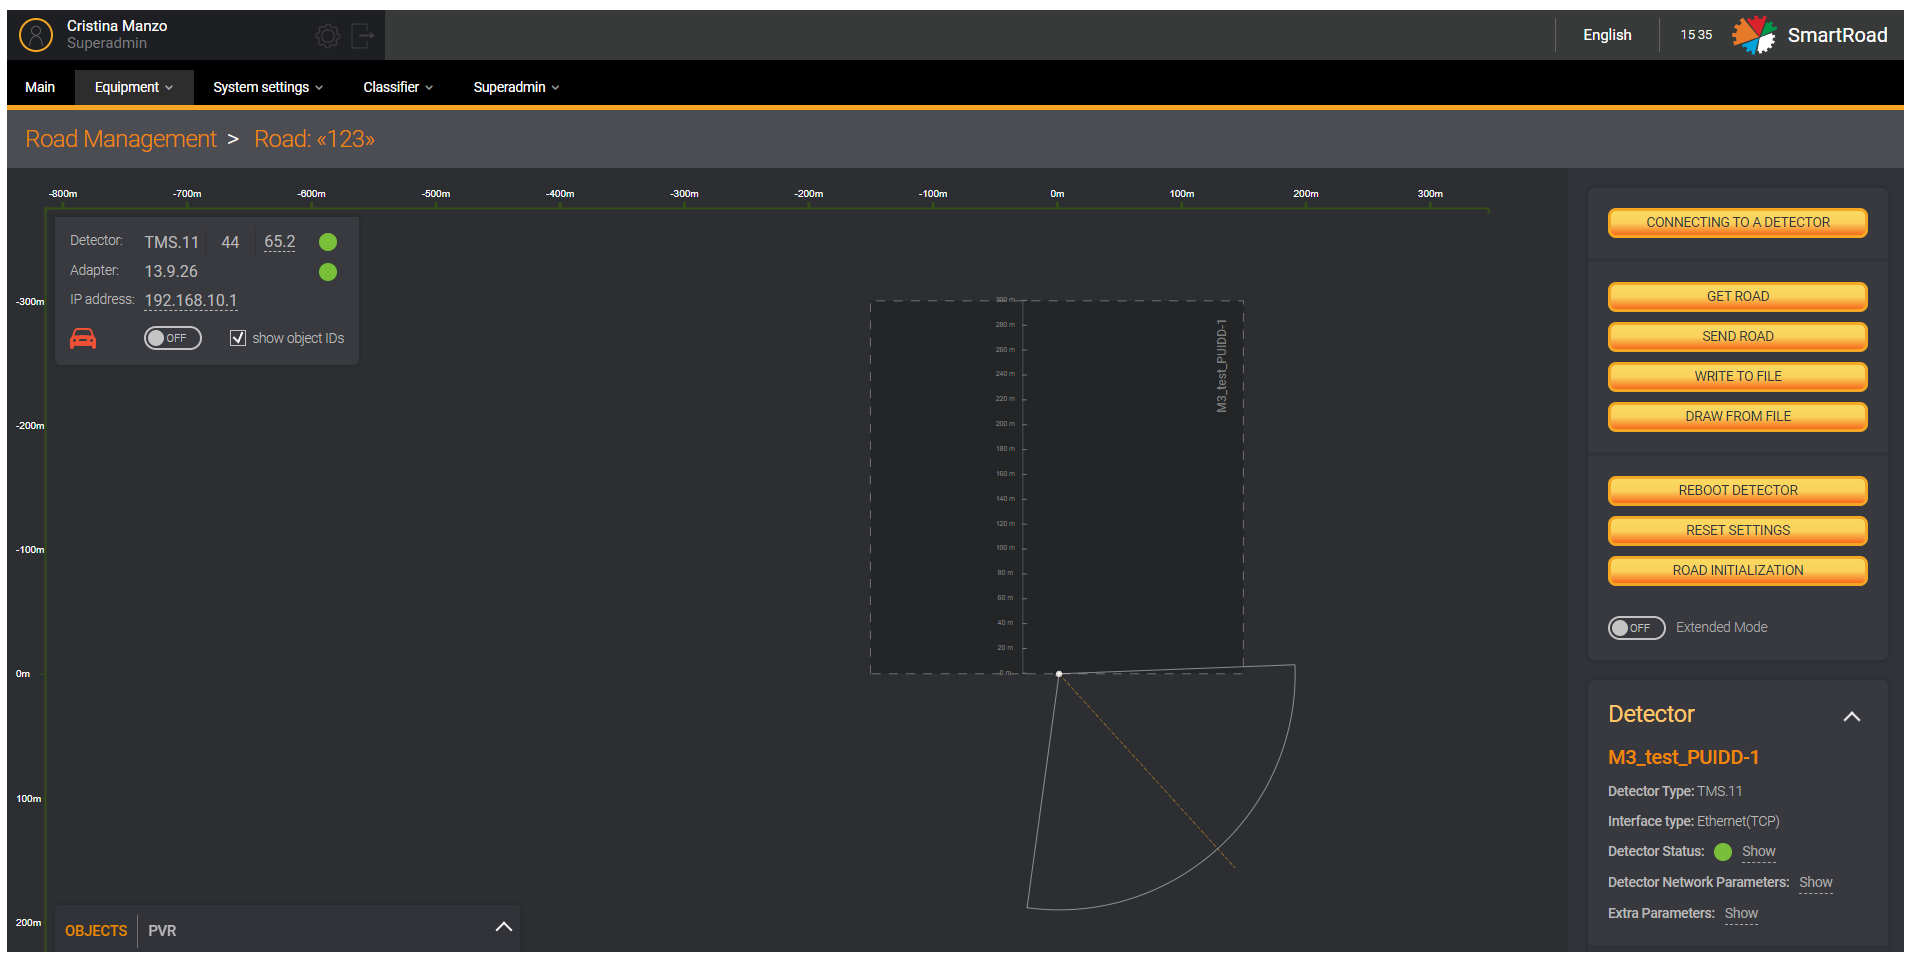
Road management module
This module is designed for setting up and managing roads. It includes a side menu item Object Tracking and section Road Management.
Object tracking
This functionality is being developed currently
This section of the side menu is designed to select a detector that will track the location of objects and obtain object parameters in a mode close to real time.
Road management section
Section Road Management includes additional functionality for setting up the road and equipment, which allows you to configure the parameters of the detector, traffic lanes, detection zones, detector triggers, using a graphical interface. All detector settings can be written to the memory of the selected detector and read from it for reconfiguration.
You should click on the option Road parameters in the menu Equipment for going to Road Management page, and then select the required road.
The Road Management page contains a list of roads that have already been configured and includes improved options for configuring roads and equipment.
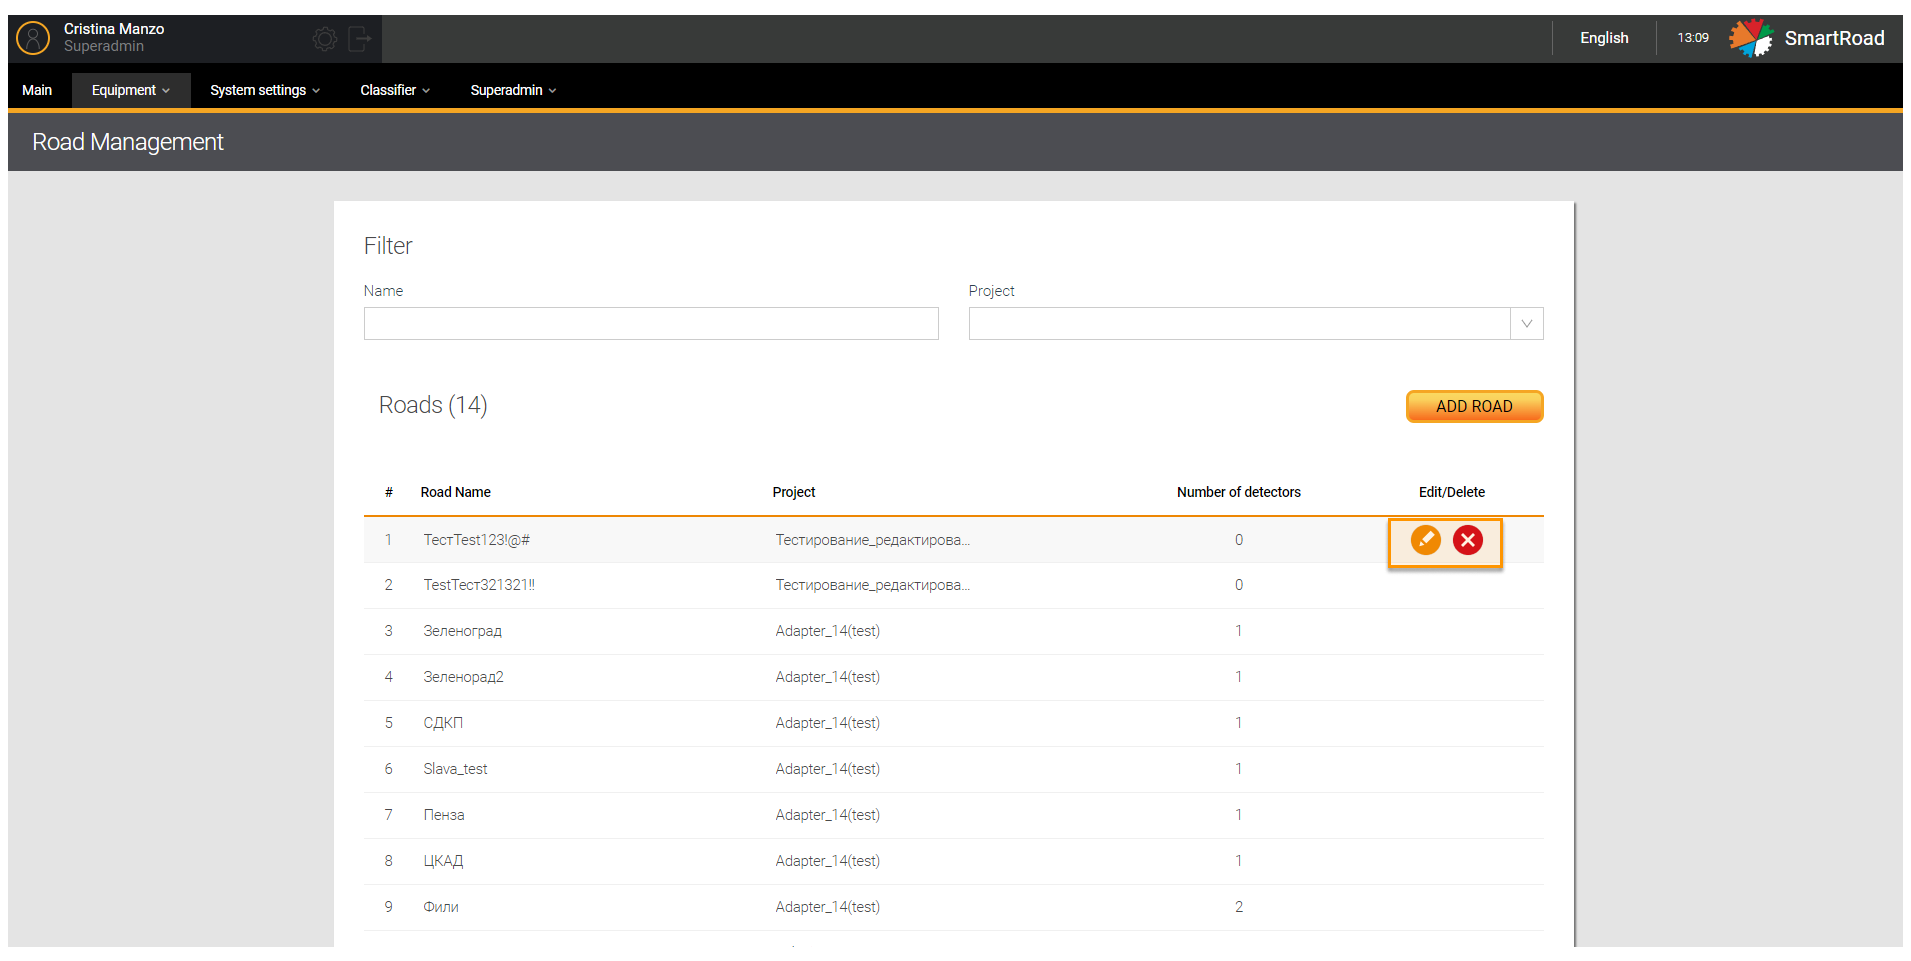
The Description of fields in the Road Management submenu in the tables below
| Field | Description |
|---|---|
| Road name filter | Field for entering the name or part of the road name |
| Project filter | Drop-down list for selecting a project. The choice is made by setting a checkbox. |
| # | The serial number of the entry in the list |
| Road name | The name of the road specified when creating/adding the road |
| Project | The project to which the configured road belongs |
| Number of detectors | Total number of installed and configured detectors on a |
| Edit Delete | Icons for deleting an entry in the list and changing road parameters. To edit an existing entry in the list, you need to hover your mouse over the item in the list and click on the edit icon. When you click the button, an editing window will open with the previously specified parameters. To remove a road from the list, click the delete icon and confirm the deletion in the pop-up window. |
Setting up the road is done by clicking on the button Add a road to the pages Road Management. When pressed, a window for entering road parameters is displayed.
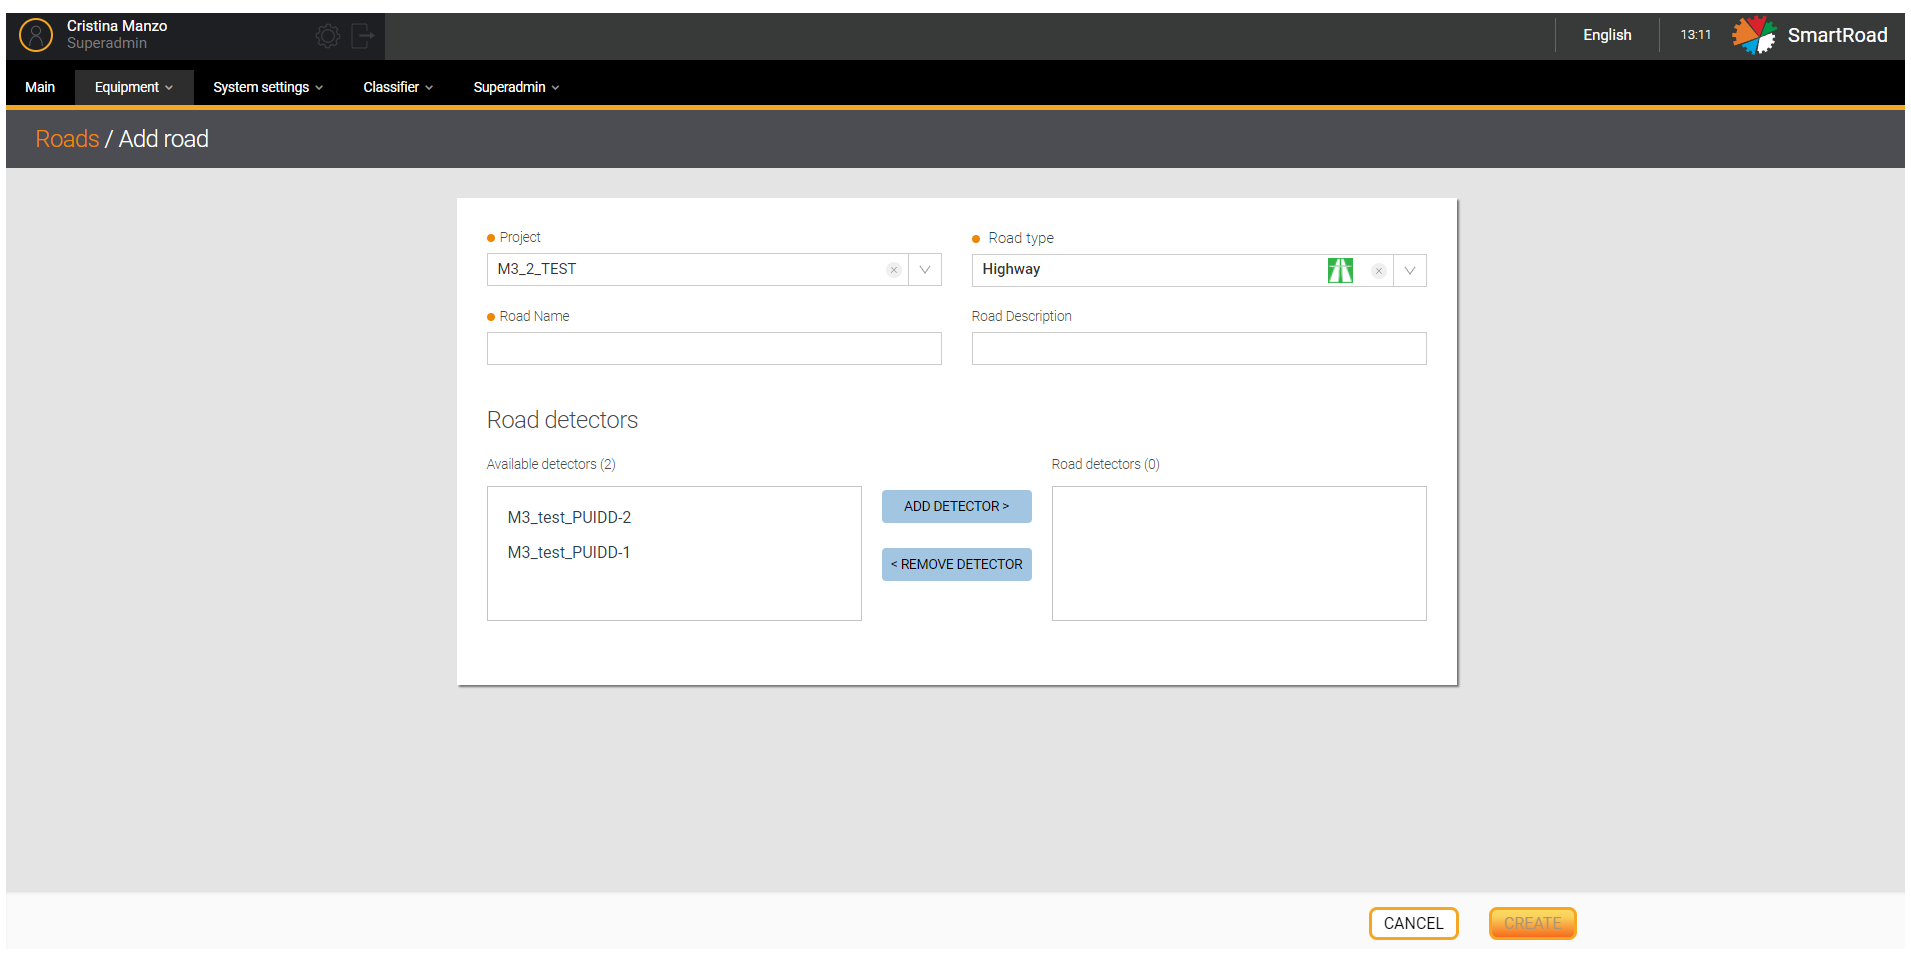
In addition, the parameters Description of the Add Road window
| Parameter | Description |
|---|---|
| Project* | Drop-down list for selecting a project in which a new road will be configured in the System. The drop-down list contains all projects for the current organization. |
| Road type* | Field for selecting the type of road. The drop-down list contains entries from the road type directory. |
| Road name* | Field for entering the name of the road, which will be displayed in the road list section. |
| Description of the road | Field for entering a road description or user comment |
| Road detectors | Section for adding available detectors to the road. All available detectors within the selected project will be displayed in the available Detectors field. To add a detector, you have to select a detector and click on the Add detector button. To remove a previously added detector, select an entry in the Road detector field and click on the Remove detector button . |
| Create/Save (in edit mode) | Button to create a new road. After clicking on the button, a new road will be created in the System, and the user will go to the road editor window |
| Cancel | Button to cancel the creation of a new road. The user will be returned to the road list section. |
(*) - It is a required parameter to add a road
Tracking
The Mode Tracking enables to display objects registered by the detector in real time in a graphic editor. This mode helps adjust the settings of traffic lanes and detection zones in accordance with the movement of real traffic flow.
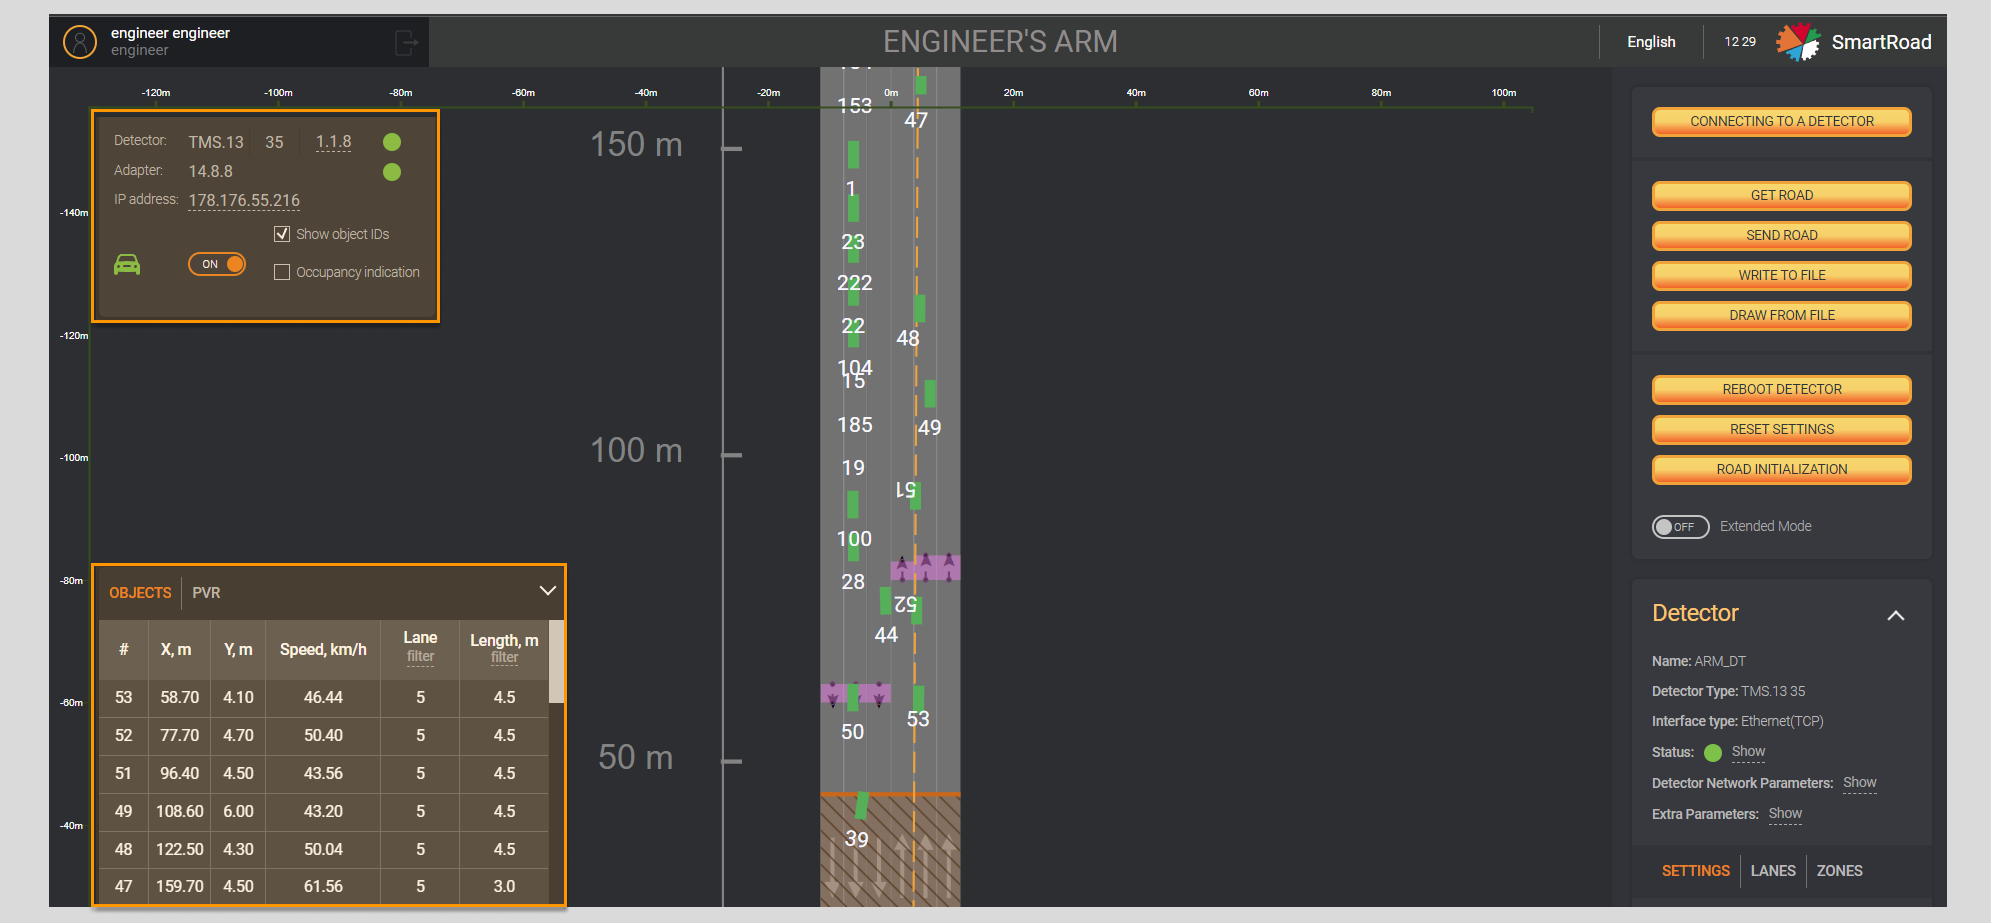
This mode can be enabled in the right panel.
![]()
In the table below the Tracking block parameters are described
| Parameters | Description |
|---|---|
| Tracking | Tracking mode switch |
| Show object IDs | Checkbox that enables to display object ID numbers |
In addition, tracking mode can be enabled on the information panel on the left by clicking the mode switch Tracking. Green rectangles in movement will appear in the graphic editor, indicating objects in the DT detection zone.
![]()
Data monitoring
The data monitoring block is a table that displays real-time data realted to objects registered by the System. This block table will be filled with data when the function Tracking is enabled. The block can be expanded or collapsed by clicking on it. Besides, this block has two tabs Objects and PVR.
Below you can find the parameters available in the Object tab
| Parameters | Description |
|---|---|
| # | ID number assigned to the object by the System |
| X, m | Positioning the drawn object on the canvas along the X axis |
| Y, m | Positioning a drawn object on the canvas along the Y axis |
| Speed, km/h | Object speed |
| Lane | The band index in the detector |
| Length, m | Object length |

Besides the parameters in PVR tab
| Parameters | Description |
|---|---|
| PVR | Amount of PVR data collected by the detector |
| Refresh icon | Button to reset all recorded PVRs |
| # | ID number assigned to the object by the System |
| Speed, km/h | Object speed |
| Lane | Band index in the detector |
| Filter | Sorting registered objects by the band or bands selected in the filter |
| Zone | Zone index in the detector |
| Length, m | Object length recorded by the System |
| Filter | Sorting objects by length (from and to) |

In the field From, m you can enter a value from 0 to 45 m, and in the To, m field from 0 to 45 m
Firmware
You can go to the Firmware section through the Equipment menu and Road Management option when clicking on a row in the road table of the project.
The management page for the selected road will appear. If you click on the underlined number in front of the detector status in the table located in the upper-left corner, a window with firmware parameters will appear.
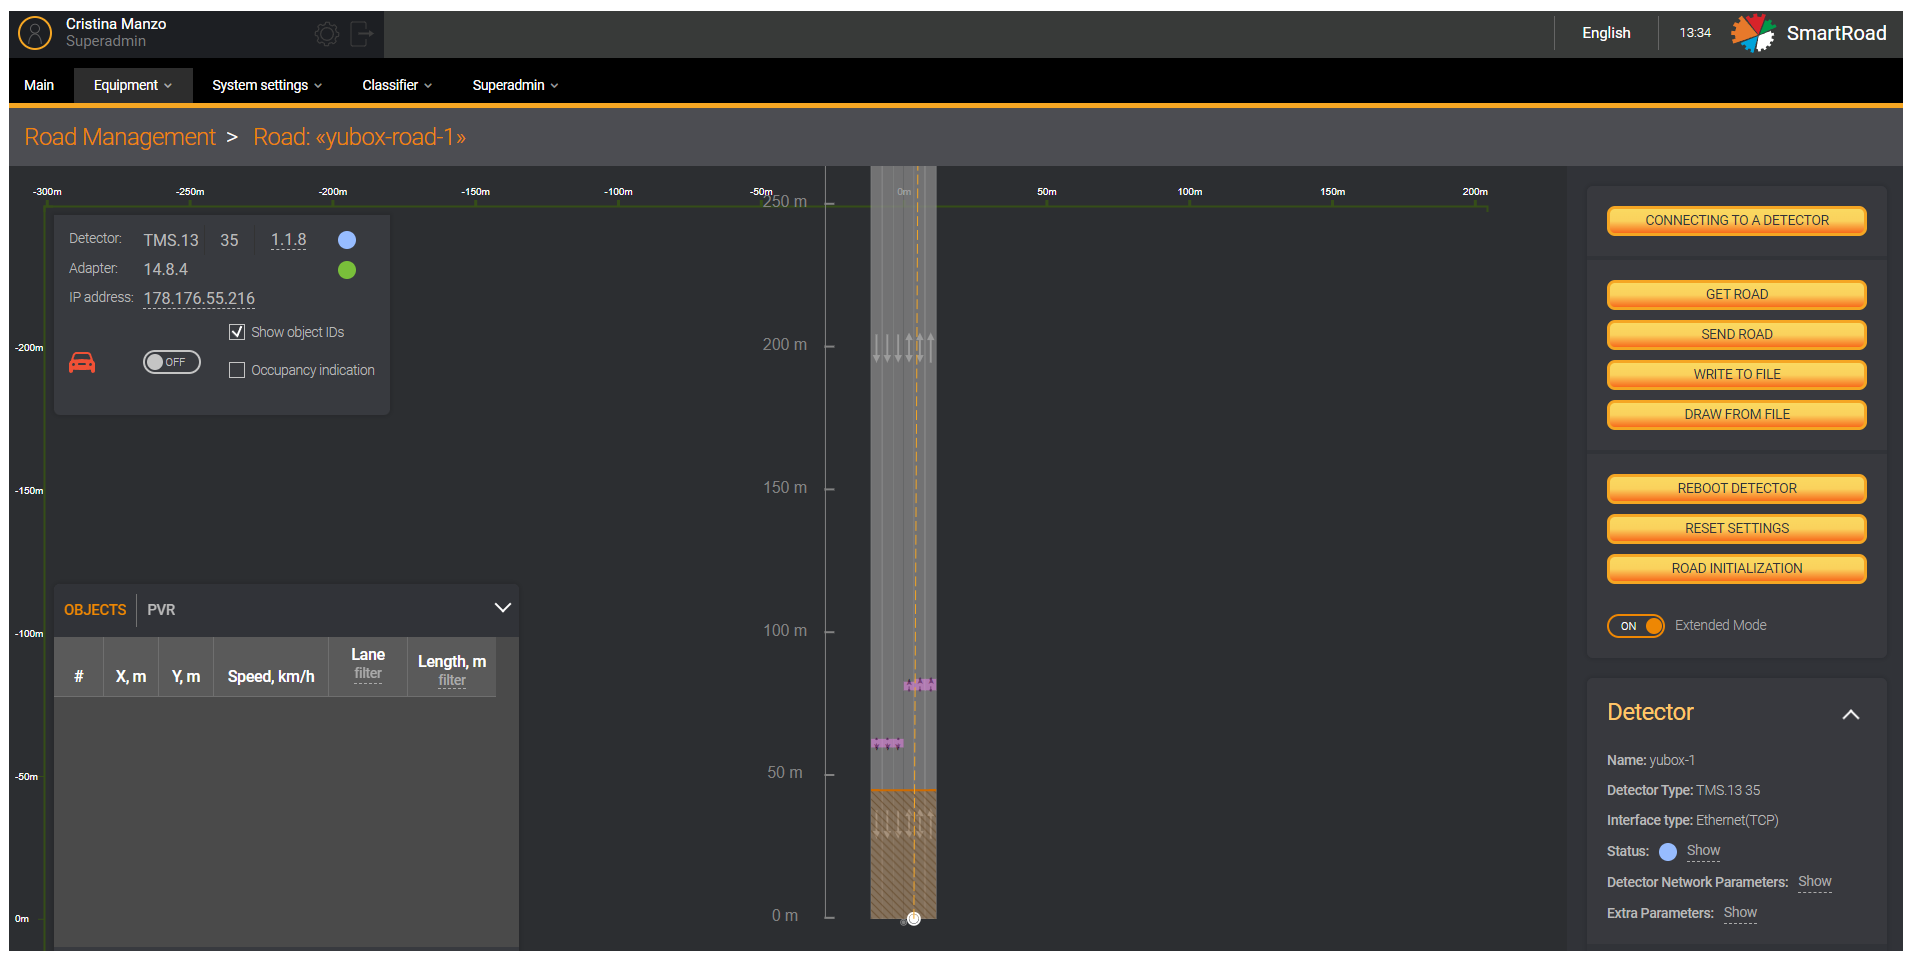
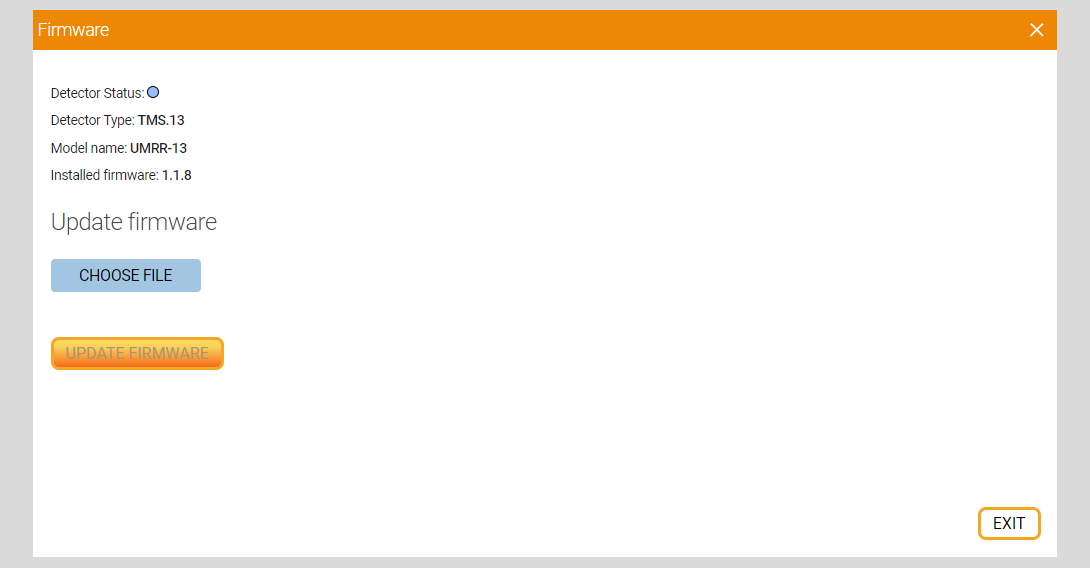
The Detector firmware parameters are described in the next table
| Field name | Description |
|---|---|
| Detector status | Displays the operating status of the detector |
| Detector type | The series of the detector selected for firmware is displayed |
| Detector model name | Detector model is displayed |
| Installed software (Firmware) | The installed software version is displayed |
| Select a file | When you click the button, a window opens for selecting a file on the user’s PC. After selecting, the field displays the path to the file and the file name: File type: .app |
| Update firmware | When you press the button, the firmware in the detector is updated. |
Fields whose values are entered incorrectly will be highlighted in red. The values in them need to be changed.
Traffic monitoring
This functionality is being developed currently.
It is available through
Road Managementsection.
This functionality is designed to configure transport detectors in relation to the selected project and road. Allows you to configure detector parameters, traffic lanes, detection zones, detector triggers, using a graphical interface. All detector settings can be written to the memory of the selected detector and read from it for reconfiguration. The configuration of this module is done in a complementary software (The engineer's ARM) by Sorb Engineering specialists.
